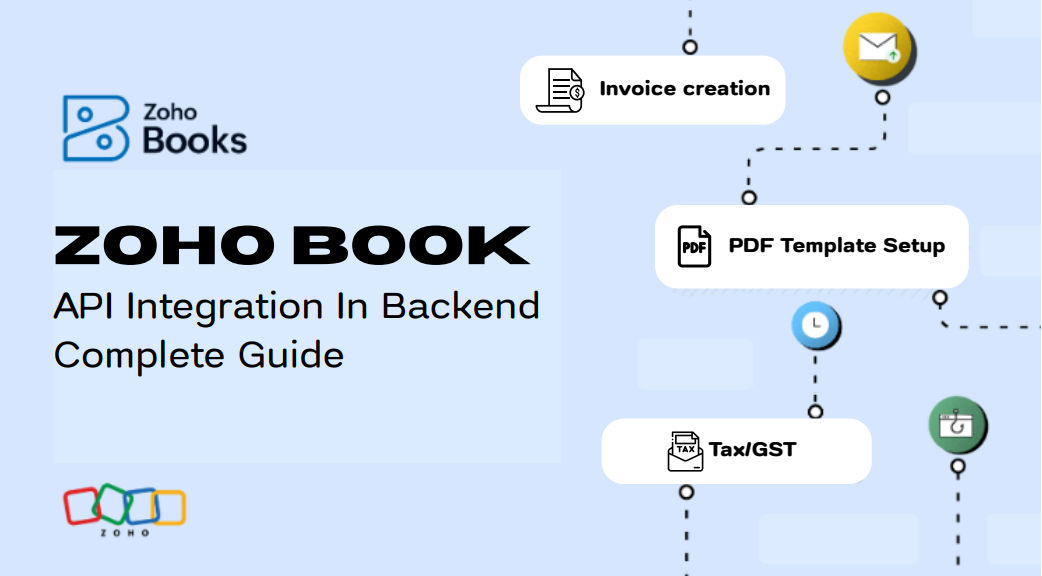
Invoice Creation In Zoho Book
How to Create an Account in Zoho :
Zoho offers powerful tools for businesses and developers. In this blog, we will explain step by step how to:
- Create a Zoho Books account
- Create a Zoho Developer account
Part 1: How to Create an Account in Zoho Books
Zoho Books is an online accounting software used for invoicing, GST compliance, expenses, and financial reports.
Step 1: Visit the Zoho Books Website
- Open your web browser
- Go to https://www.zoho.com/in/books/
Step 2: Click on Sign Up Now
- On the homepage, click the Sign Up Now button
- Zoho Books usually offers a free trial
Step 3: Create a Zoho Account
You can sign up using:
- Email address
- Google account
- Microsoft account
If using email:
- Enter Company Name
- Enter your Email Address
- Enter your Mobile No
- Create a Password
- Choose your Country
- Choose your State
- Accept the terms and conditions
- Click Create My Account
Step 4: Verify Your Email
- Zoho will send a verification email
- Open your email and click the verification link
- Login in your Zoho Book Account
Step 5: Zoho Books Account Created
Your Zoho Books dashboard will open.
Step 6: From Settings to Invoice Creation
This guide walks users through the entire flow of an invoicing system, starting from Settings and ending with Invoice Creation. You can use this directly as a blog post or documentation page.
-
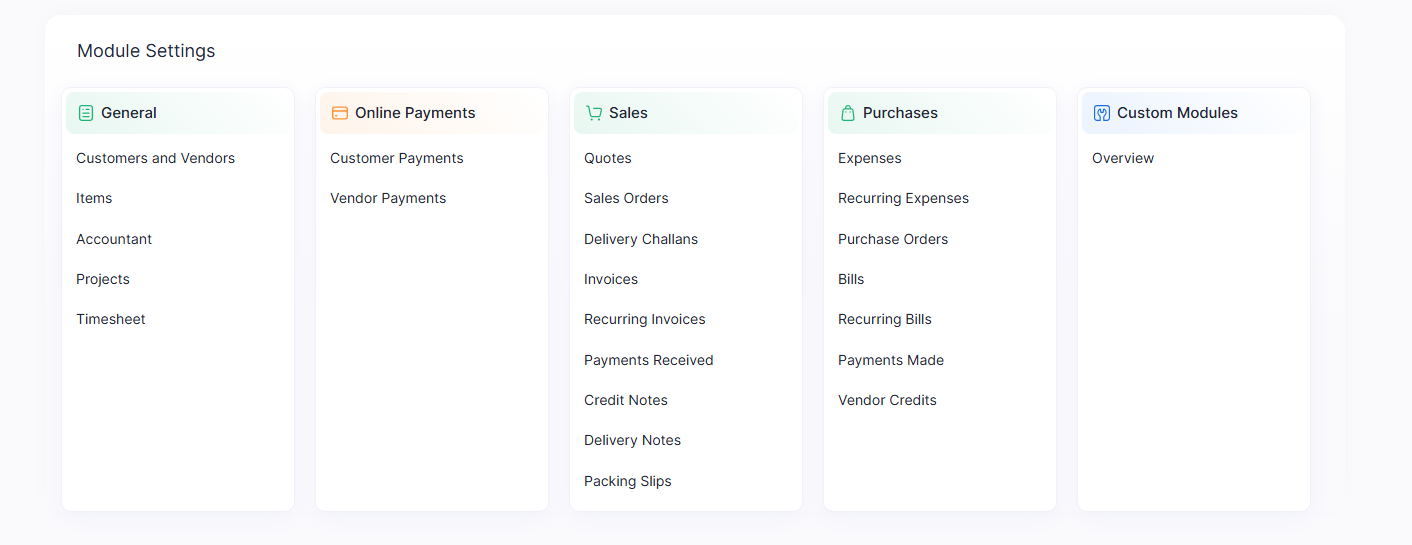
Go to Settings
The Settings section is where you configure your business details, taxes, templates, and system preferences before creating any transactions.
Steps:
- From the dashboard, click Settings (usually available in the sidebar or top menu).
- The settings page will display multiple configuration options such
as:
- Business Details
- Order Details
- Tax Setup (GST)
- PDF Template Setup
- User & Permissions (optional)

-
Organization Details Setup
Order details define how your invoices and orders behave across the system.
Steps:
- In Settings, click Organization Details.
- Edit your details
- Save the changes
-
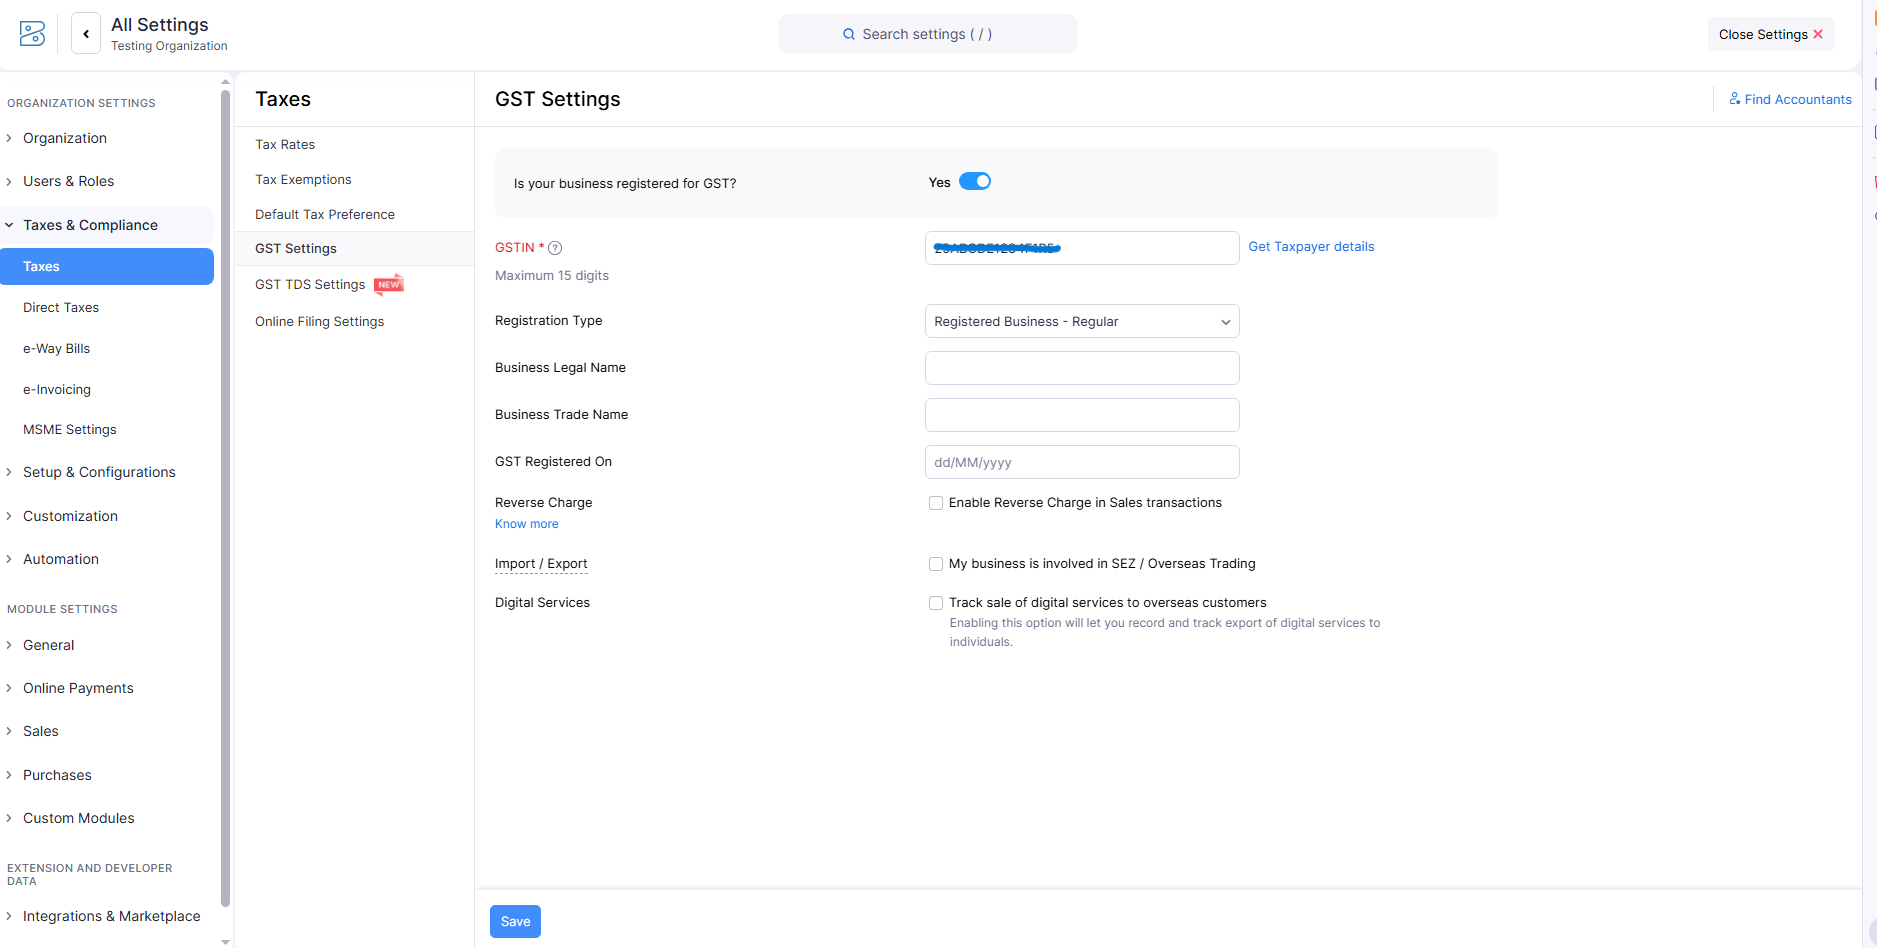
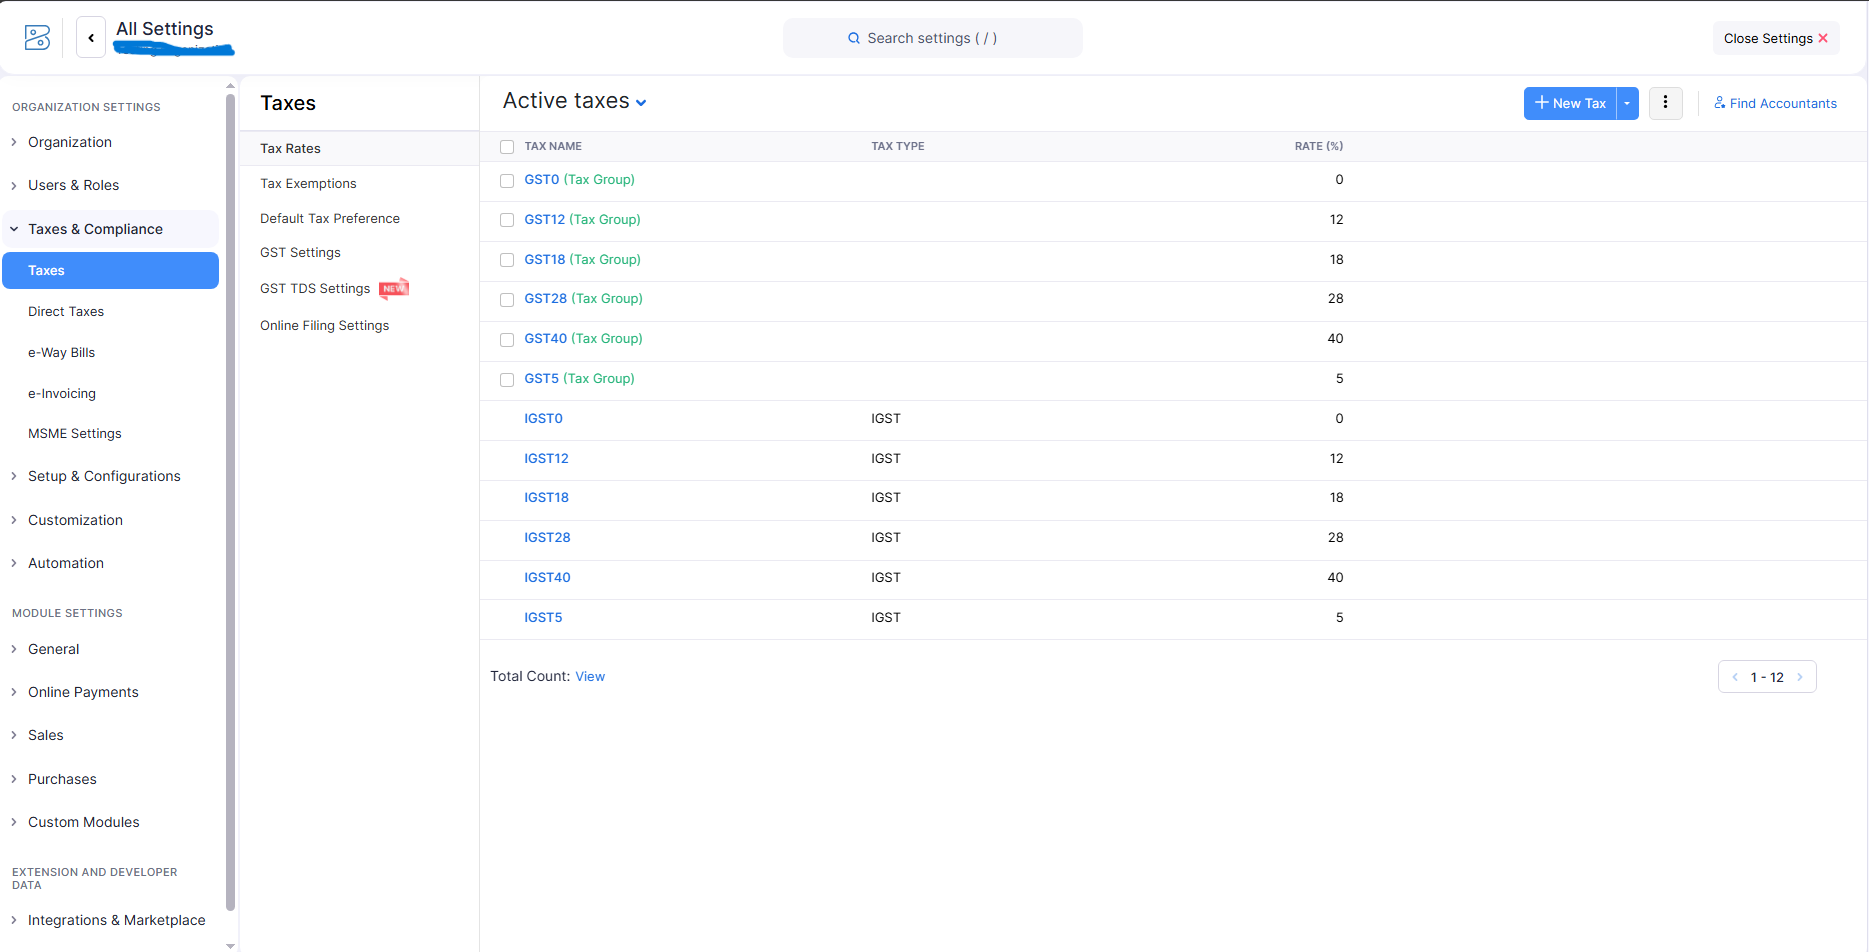
Tax Details Setup (GST Setup)
This section is critical for businesses registered under GST.
Steps:
- Go to Settings → Tax Details / GST Setup.
- Enable GST
- Enter your GST information:
- GSTIN number
- Business legal name
- State and place of supply
- Configure tax slabs:
- CGST
- SGST
- IGST
- Applicable percentages (5%, 12%, 18%, 28%)
- Save the tax configuration.
-
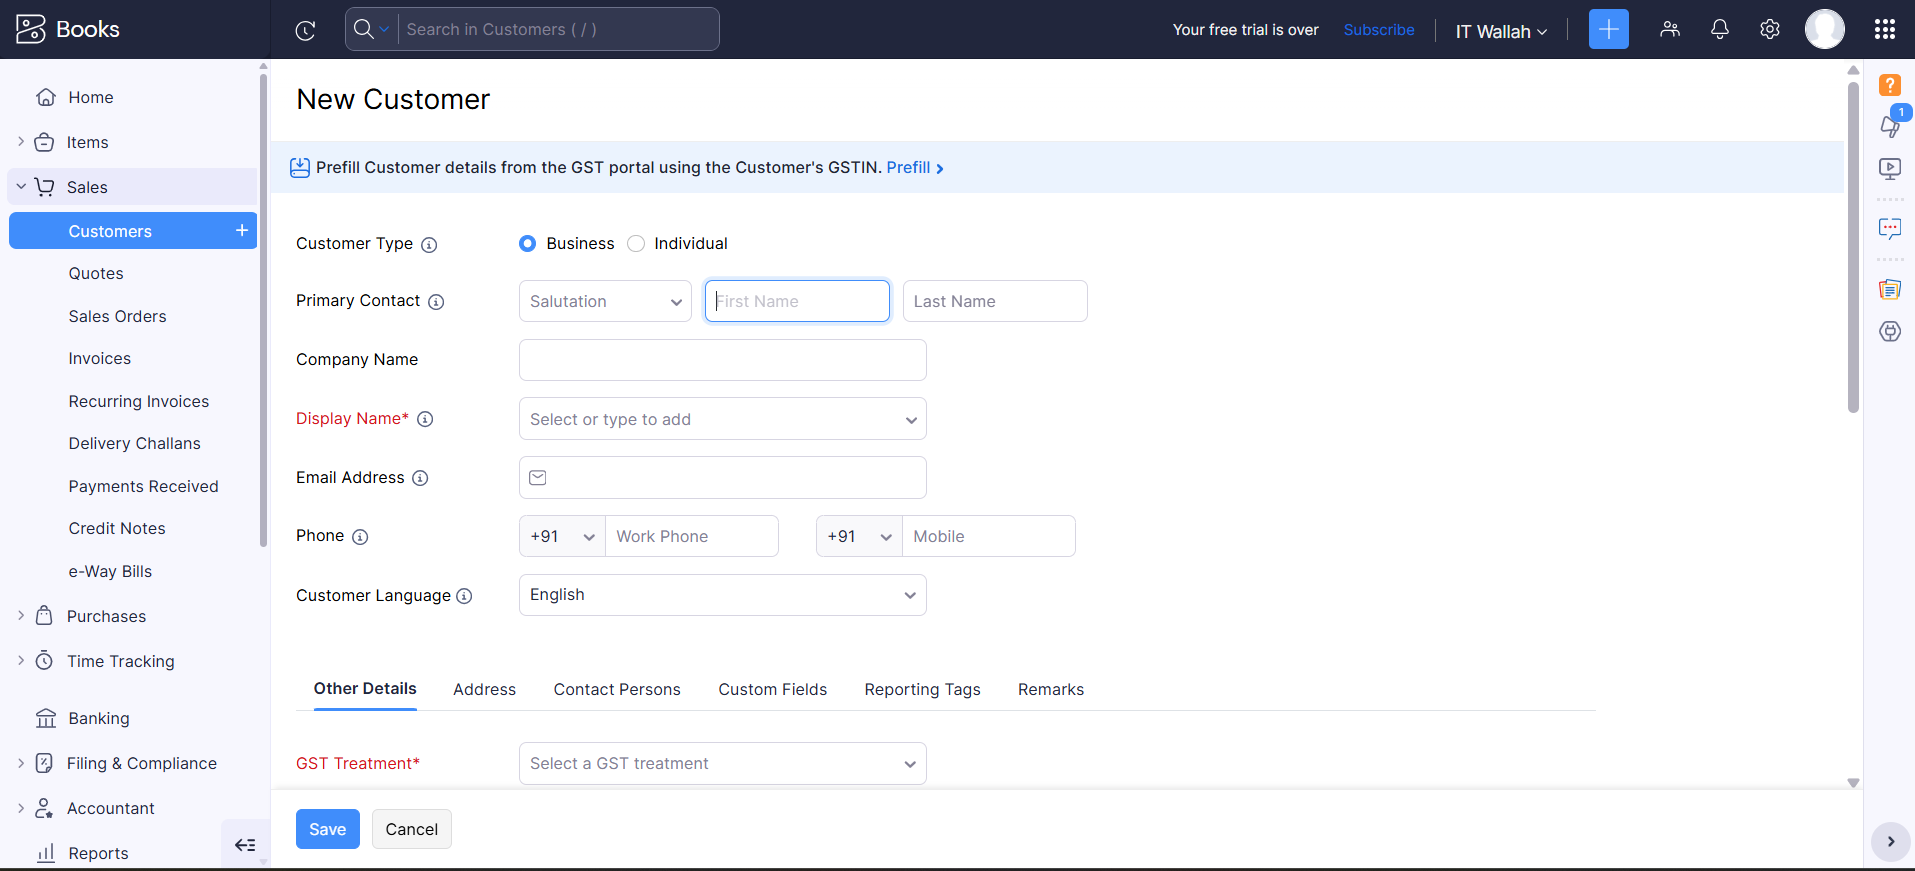
Create Customer using UI
Customers must be added before creating invoices.
Steps:
- Go to Customers → Create Customer
- Enable GST
- Enter customer details:
- Customer name
- Email address
- Phone number
- Billing address
- If applicable, add GST details:
- GSTIN
- State
- Customer type (Registered / Unregistered)
- Save the customer
-
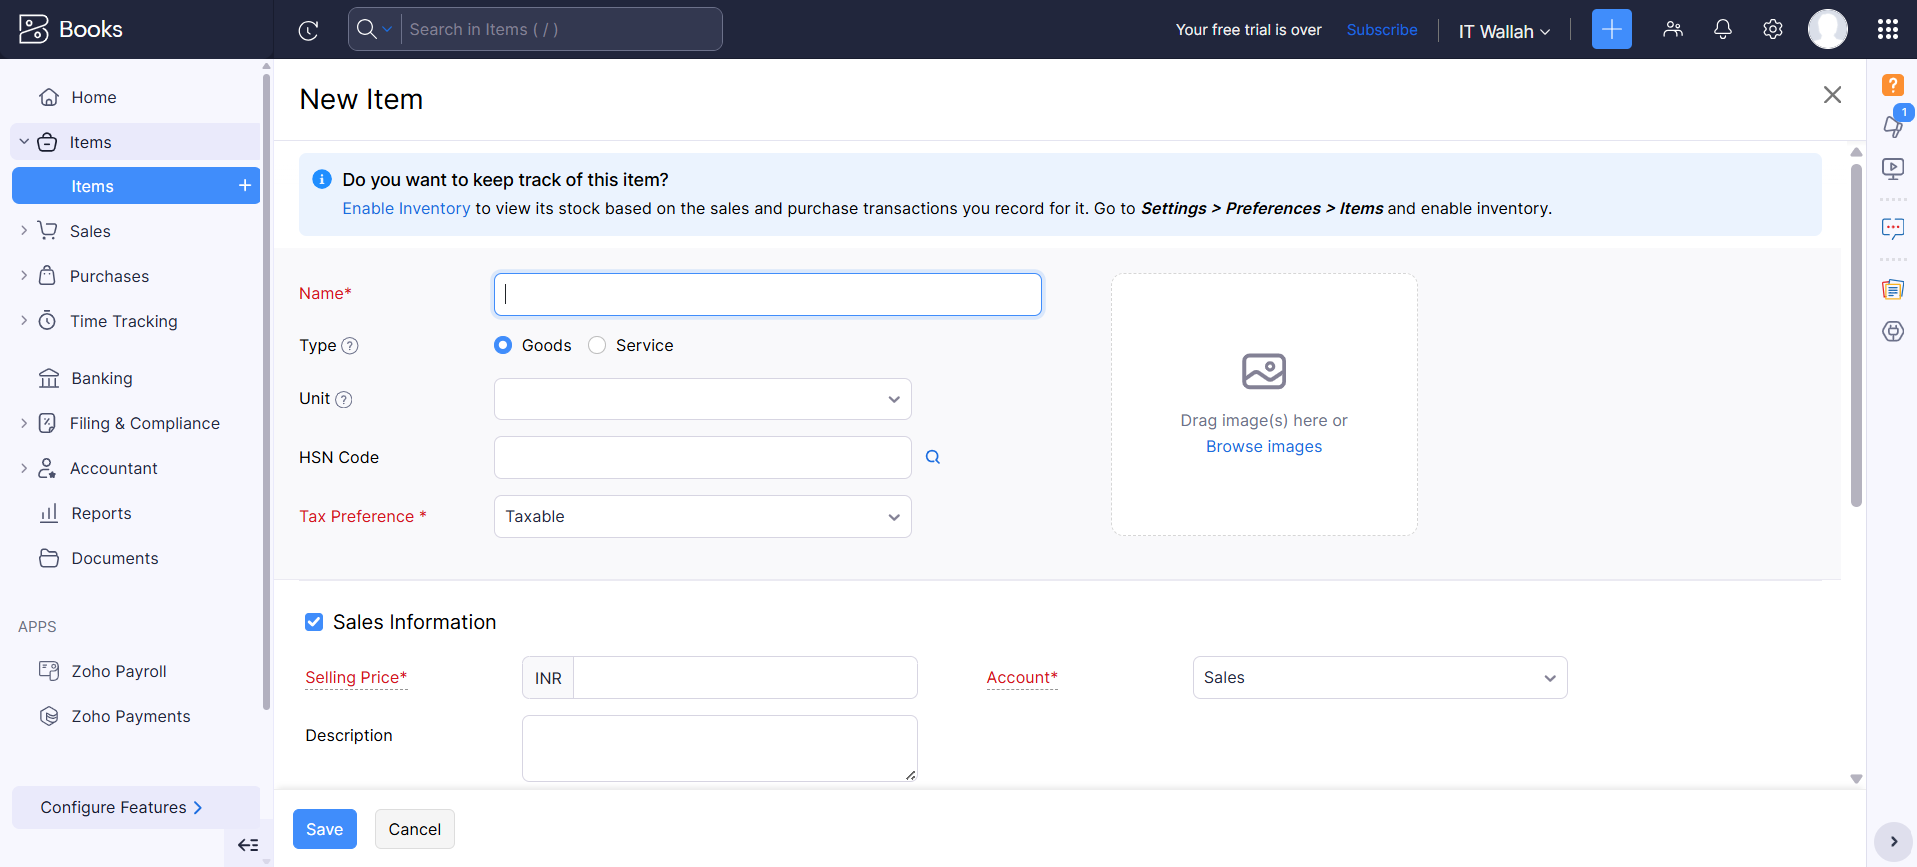
Create Item / Product using UI
Items or services are required to generate invoices.
Steps:
- Go to Items / Products → Create Item
- Enter item details:
- Item name
- Description
- Item type (Product / Service)
- Set pricing:
- Selling price
- Tax applicability
- GST percentage
- Configure stock details (if applicable):
- SKU
- Quantity
- Save the item.
-
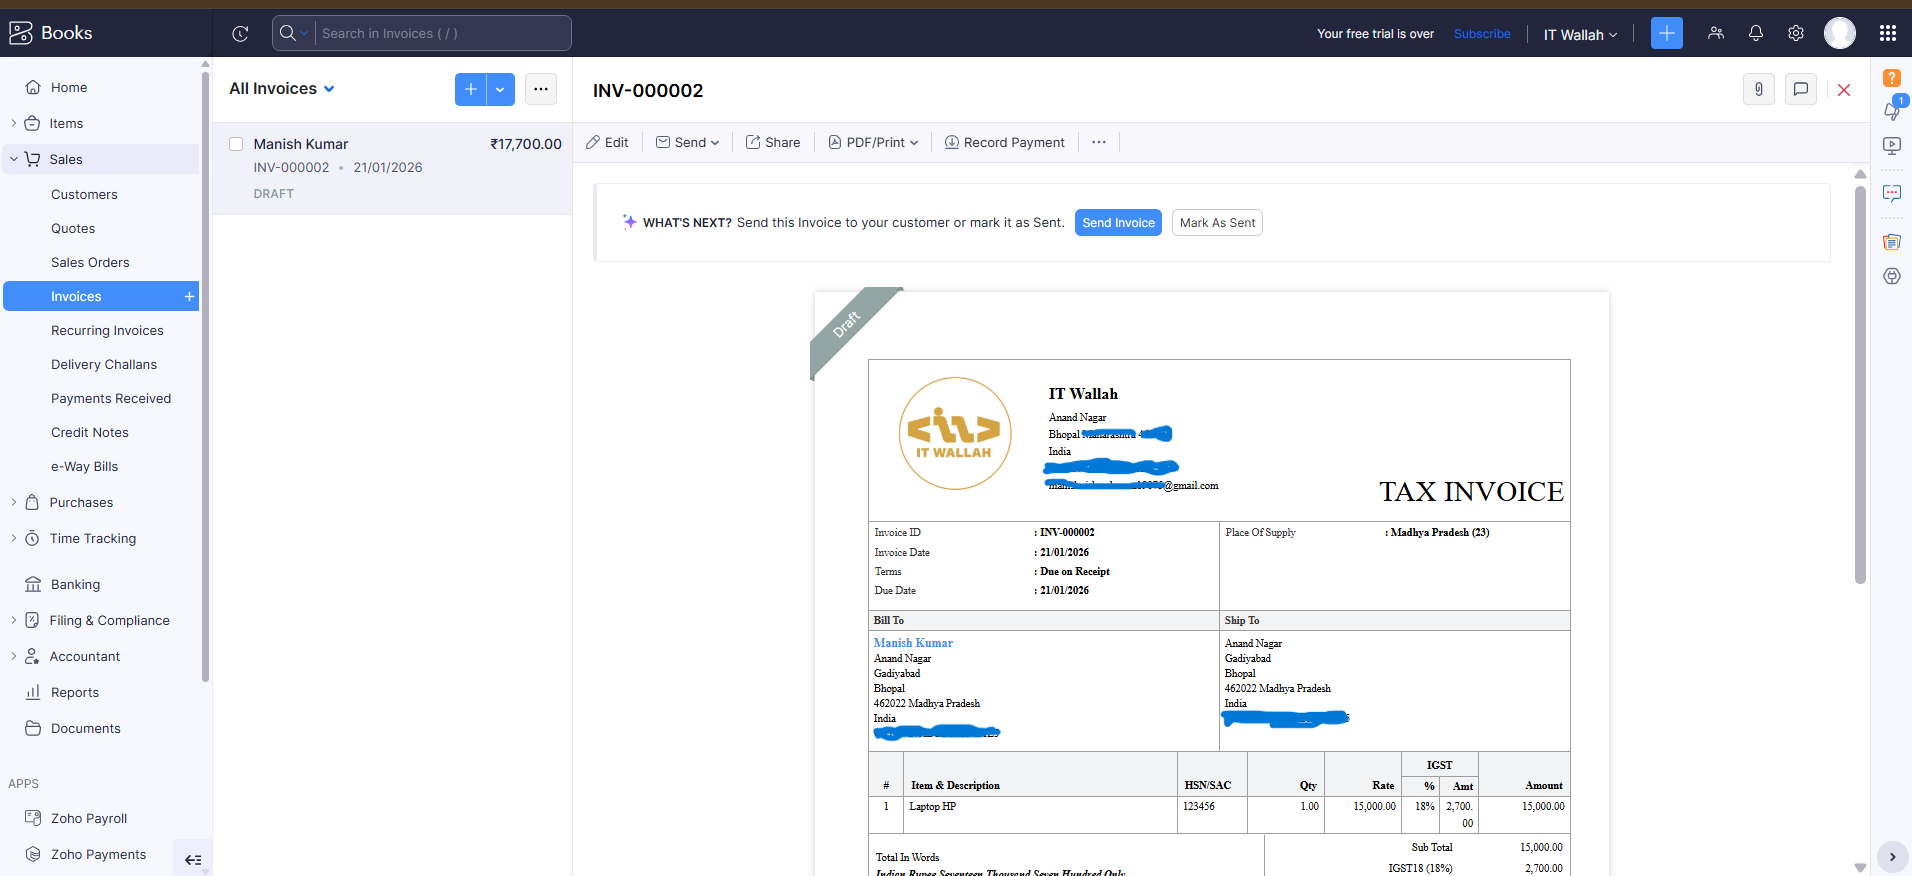
Create Invoice using UI
Once everything is set up, you can easily generate invoices for your customers.
Steps:
- Go to Invoices → Create Invoice
- Select the customer.
- Add items:
- Choose items from the list
- Adjust quantity and price if required
- Verify tax calculation:
- CGST / SGST or IGST applied automatically
- Set invoice details:
- Invoice date
- Due date
- Payment terms
- Add notes or terms & conditions (optional).
- Save the invoice.

-
Download or Share Invoice using UI
After creating an invoice, you can download or share it with the customer using multiple options.
Options:
- Download the invoice as PDF.
- Print the invoice.
- Email the invoice directly to the customer.
- Share the invoice:
- Via WhatsApp (if supported)
- Using a shareable link
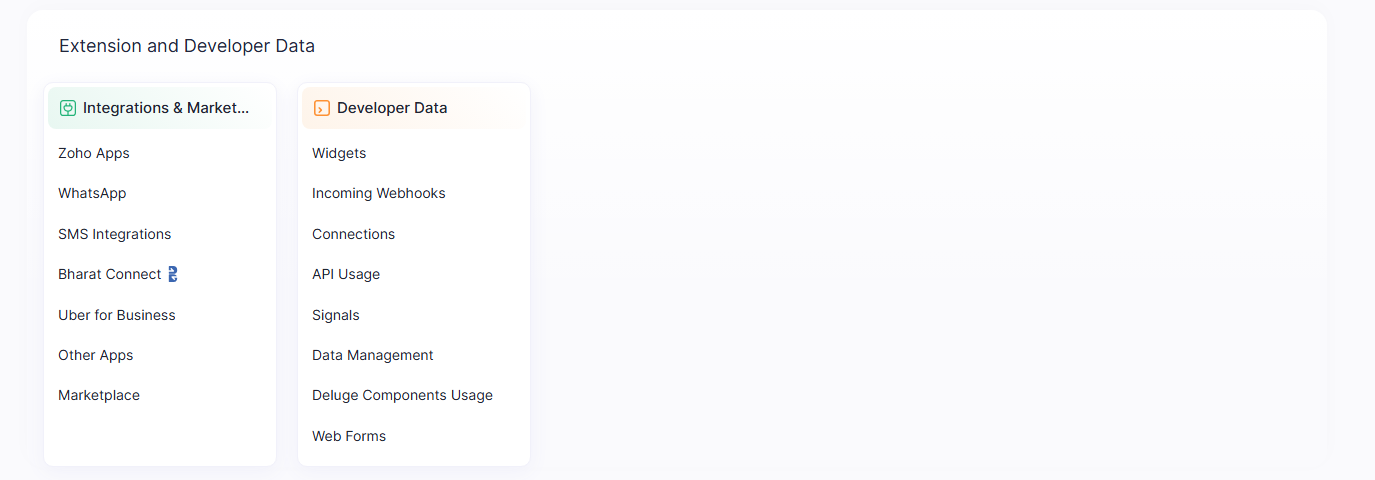
Part 2: How to Create a Zoho Developer Account
A Zoho Developer account is used to create APIs, build extensions, and integrate Zoho with other applications.
Step 1: Visit Zoho Developer Portal
- Open your web browser
- Go to https://api-console.zoho.com
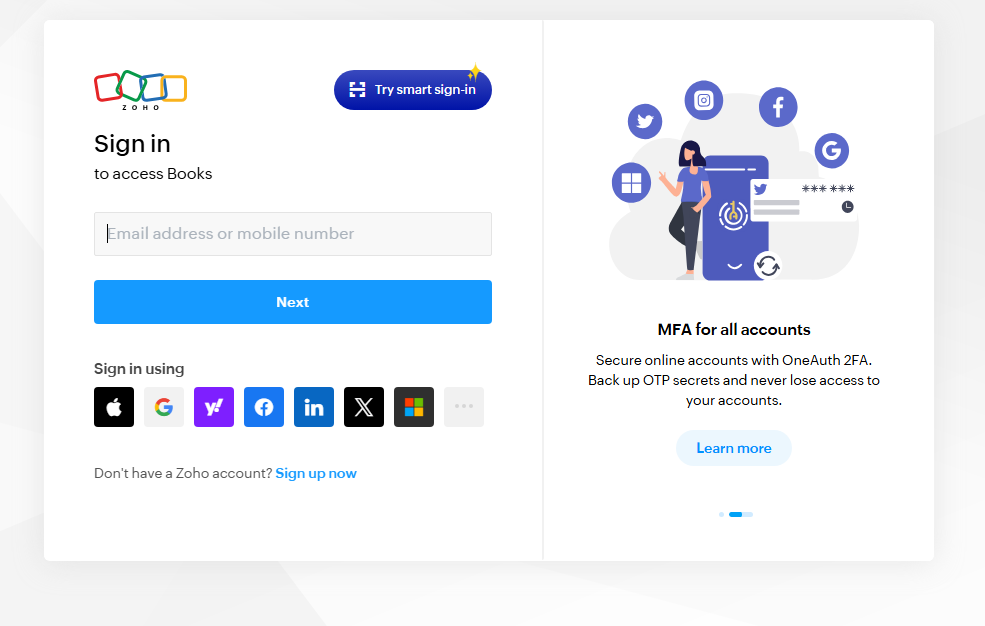
Step 2: Sign In with Zoho Account
- Use the same Zoho account you created earlier
- If not logged in, enter your email ID and password
Step 3: Access Developer Console
- After login, you will be redirected to the Zoho API Console
- This automatically activates your Zoho Developer account
- No separate registration is required
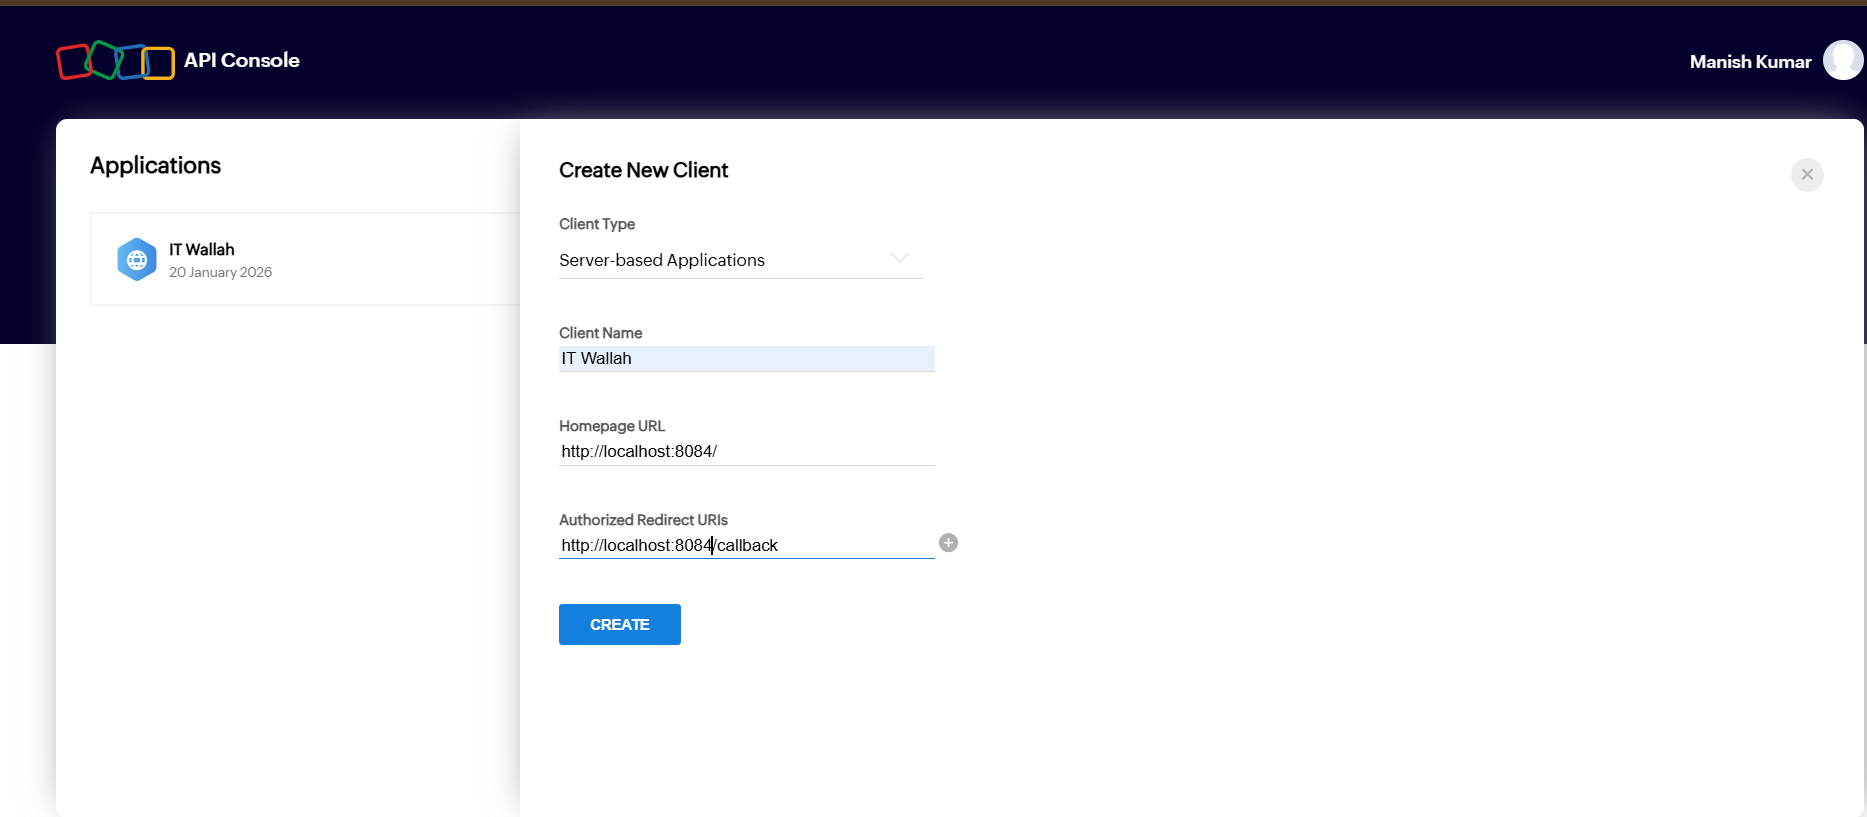
Step 4: Create a New Client (App)
- Click on “Add Clientâ€
- Choose client type:
- Server-based (for development - select this option)
- Client-based
- Self Client (for testing APIs)

Step 5: Enter Client Details
- Provide the following details:
- Client Name
- Homepage URL (can be a dummy URL for testing)
- Authorized Redirect URI
- Click on Create.
Step 6: Get Client ID and Client Secret
- After creating the client, you will receive:
- Client ID
- Client Secret
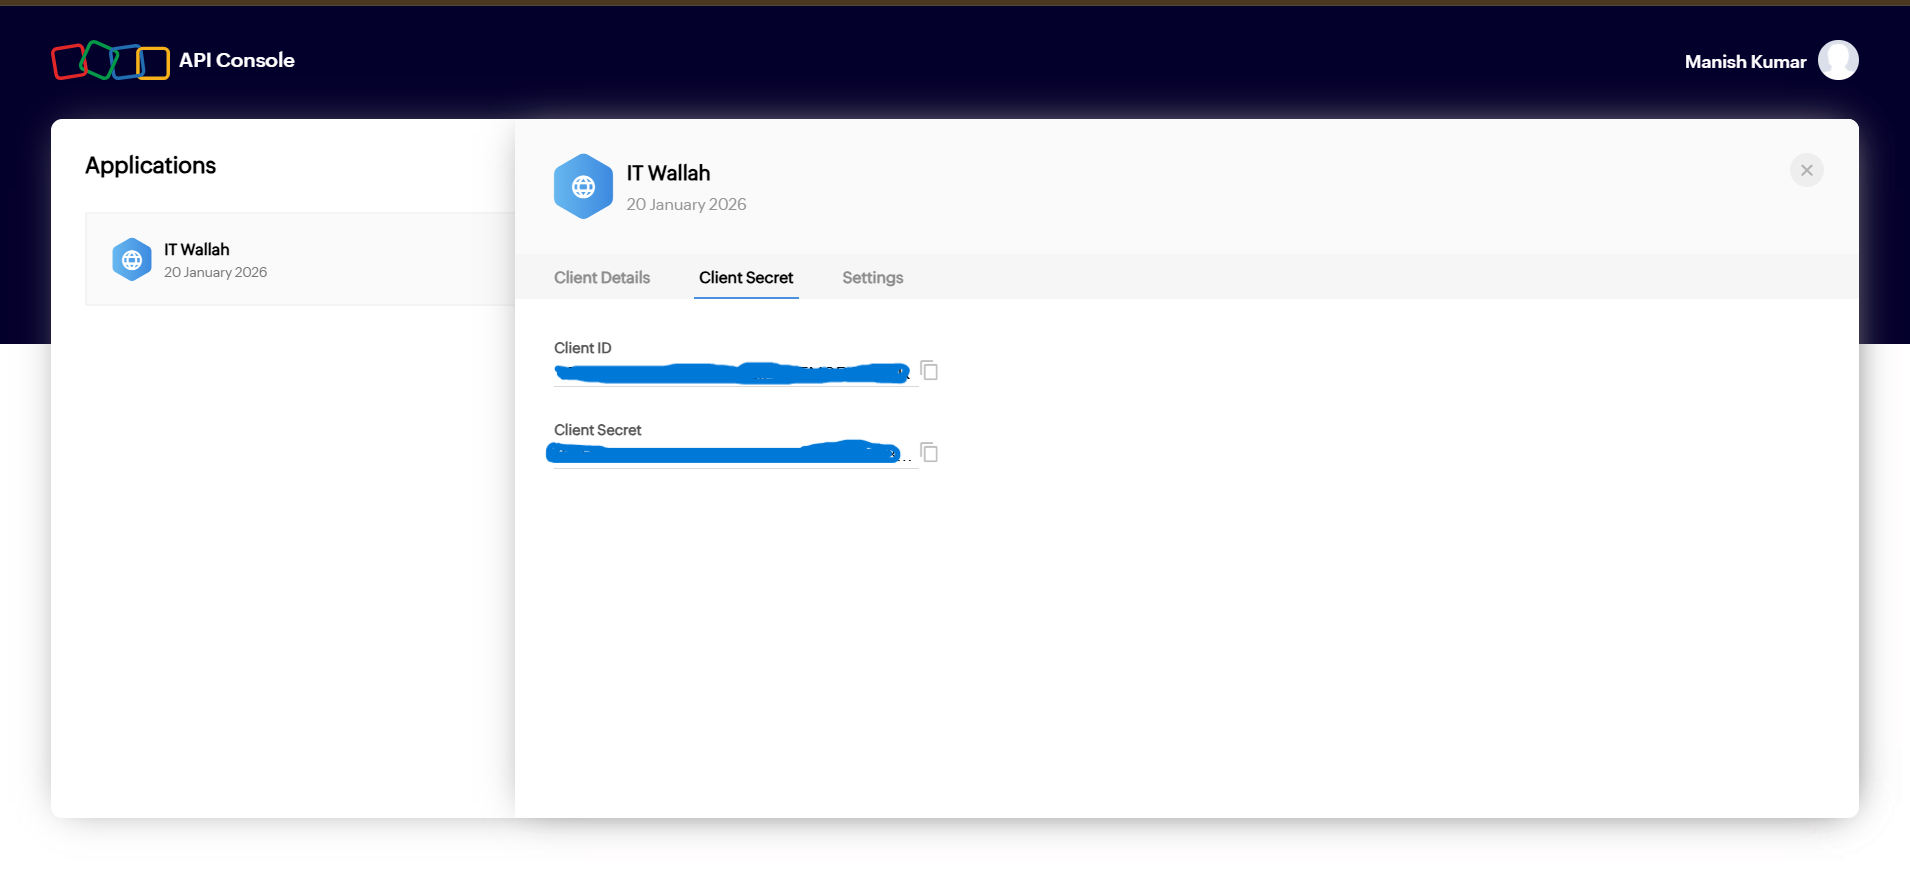
- API authentication
- OAuth integration
Step 7: Start Using Zoho APIs for Invoice Creation
- Ensure the following prerequisites are available:
- A Zoho account
- A Zoho Books organization
- A registered app in Zoho API Console
- Required OAuth scopes:
- ZohoBooks.fullaccess.all
- Use the appropriate country API domain (e.g., .in, .us, etc.)
Get Authorization Code
Zoho uses OAuth 2.0.
The first step is to get a
one-time authorization code
Authorization URL
https://accounts.zoho.in/oauth/v2/auth
Query Parameters
client_id=YOUR_CLIENT_ID
response_type=code
scope=ZohoBooks.fullaccess.all
redirect_uri=YOUR_REDIRECT_URI
access_type=offline
prompt=consent
url :
https://accounts.zoho.in/oauth/v2/auth?scope=ZohoBooks.fullaccess.all&client_id=1000.0SRSxxxxxxxxxxxxxxxxxxxx239Vbr &response_type=code&redirect_uri=
https://oauth.pstmn.io/v1/callback&access
_type=offline&prompt=consent
After successful login and consent, Zoho will redirect to:
YOUR_REDIRECT_URI?code=AUTHORIZATION_CODE
Save this code — it is used only once.
Generate Access Token and Refresh Token
Now exchange the authorization code for tokens.
Token API
https://accounts.zoho.in/oauth/v2/tokenRequest (POST)
                           url -X POST "https://accounts.zoho.in/oauth/v2/token" \

                            -d "client_id=YOUR_CLIENT_ID" \

                            -d "client_secret=YOUR_CLIENT_SECRET" \

                            -d "grant_type=authorization_code" \

                            -d "code=AUTHORIZATION_CODE" \

                            -d "redirect_uri=YOUR_REDIRECT_URI"
Response
                         {

                                "access_token": "1000.xxxx",

                                "refresh_token": "1000.yyyy",

                                "expires_in": 3600

                            }
Store both tokens securely
Step 3: Refresh Access Token
Access tokens expire in 1 hour. Use the refresh token to generate a new one.
Refresh Token API
                                curl -X POST "https://accounts.zoho.in/oauth/v2/token" \

                                -d "client_id=YOUR_CLIENT_ID" \

                                -d "client_secret=YOUR_CLIENT_SECRET" \

                                -d "grant_type=refresh_token" \

                                -d "refresh_token=YOUR_REFRESH_TOKEN"
You'll receive a new access token in response.
Step 4: Get Organization ID
Every Zoho Books API call requires an organization_id.
API Endpoint
                            GET /organizations
                            curl -X GET "https://www.zohoapis.in/books/v3/organizations" \
                            -H "Authorization: Zoho-oauthtoken YOUR_ACCESS_TOKEN"
Response
                            {
                            "organizations": [
                                {
                                "organization_id": "123456789",
                                "name": "My Company"
                                }
                            ]
                            }
Step 5: Get Tax ID
If your invoice includes tax, retrieve available tax IDs.
API Endpoint
                            GET /settings/taxes

                            curl -X GET "https://www.zohoapis.in/books/v3/settings/taxes?organization_id=123456789" \

                            -H "Authorization: Zoho-oauthtoken YOUR_ACCESS_TOKEN"
Response
                            {

                            "taxes": [

                                {

                                "tax_id": "987654321",

                                "tax_name": "GST",

                            "tax_percentage": 18

                                }

                            ]

                            }
Step 6: Create Customer
Invoices must be associated with a customer.
API Endpoint
POST /contacts
Request
                            curl -X POST "https://www.zohoapis.in/books/v3/contacts?organization_id=123456789" \


                            -H "Authorization: Zoho-oauthtoken YOUR_ACCESS_TOKEN" \

                            -H "Content-Type: application/json" \

                            -d '{

                            "contact_name": "Daga Raj",

                            "company_name": "AON",

                            "email": "dagaraj@gmail.com"

                            }'
Response
                                {

                                     "contact": {

                                  "contact_id": "1122334455"

                                }

                                }
Step 7: Create Items
Items represent products or services added to invoices.
API Endpoint
POST /items
Request
                                    curl -X POST "https://www.zohoapis.in/books/v3/items?organization_id=123456789" \

                                    -H "Authorization: Zoho-oauthtoken YOUR_ACCESS_TOKEN" \

                                    -H "Content-Type: application/json" \

                                    -d '{

                                    "name": "Web Development Service",

                                    "rate": 500,

                                    "tax_id": "987654321"

                                    }'
Response
                               {
                                "item": {
                                    "item_id": "5566778899"
                                 }
                                }
Step 8: Create Invoice
Now you have everything needed to create an invoice
API Endpoint
POST /invoices
Request
                            curl -X POST "https://www.zohoapis.in/books/v3/invoices?organization_id=123456789" \

                            -H "Authorization: Zoho-oauthtoken YOUR_ACCESS_TOKEN" \

                            -H "Content-Type: application/json" \

                            -d '{

                            "customer_id": "1122334455",

                            "line_items": [

                                {

                                "item_id": "5566778899",

                                "quantity": 2,

                                "rate": 500

                                }

                            ],

                            "notes": "Thank you for your business!"

                            }'
Response
                            {

                            "invoice": {

                                "invoice_id": "9988776655",

                                "invoice_number": "INV-00001",

                                "status": "draft"

                            }

                            }
Invoice successfully created!
Correct API Execution Order (Summary)
- Get Authorization Code
- Generate Access & Refresh Token
- Refresh Access Token (when expired)
- Get Organization ID
- Get Tax ID
- Create Customer
- Create Items
- Create Invoice
Zoho Books API - Rules & Regulations
When working with the Zoho Books API, especially for creating invoices, it is critical to follow Zoho’s technical rules, country-specific regulations, and accounting compliance requ
-
OAuth & Authentication Rules
Mandatory Rules
- Zoho Books API only supports OAuth 2.0
- API keys or basic authentication are not allowed
- Authorization Code is one-time use only
- Access Token expires every 1 hour
- Refresh Token must be stored securely
You must use valid scopes such as:
ZohoBooks.fullaccess.all Insufficient scopes will result in: Unauthorized / Permission Denied -
Data Center & Country Rules
Zoho Books is region-locked.
API Domain Must Match Organization CountryCountry API Domain USA / Global zohoapis.com India zohoapis.in EU zohoapis.eu Australia zohoapis.com.au Japan zohoapis.jp Using the wrong domain = API failure
Tokens are not cross-region compatible -
Organization Rules
Organization ID Rules
- Every API request must include organization_id
- organization_id is unique per country
- One OAuth token can access multiple organizations, but you must explicitly select one
Validation API
GET /organizations -
Customer (Contact) Rules
Mandatory Fields
- contact_name (required)
- Email (recommended for invoice sending)
Country-Specific Rules
Country Special Requirements India GST Treatment UAE TRN EU VAT Number USA Sales Tax settings Invoices cannot be created without a valid customer.
-
Item Rules
Mandatory Item Rules
- Each invoice must have at least one line item
- Items must exist before invoice creation
- Rate must be numeric
- Quantity must be ≥ 1
Tax Rules for Items
- Tax must be linked via
tax_id - Do not hardcode tax percentage
- Tax behavior depends on country
-
Tax Rules (Country-Wise)
Taxes are strictly regulated by country laws.
India (GST)
Mandatory Fields
- GST Treatment
- Place of Supply
- GSTIN (for registered businesses)
Tax Types
- CGST + SGST (intra-state)
- IGST (inter-state)
USA (Sales Tax)
- Tax depends on state
- Tax authority configuration required
- Sales tax may be optional
Missing or incorrect tax fields = invoice rejection.
-
Invoice Creation Rules
Mandatory Invoice Fields
- customer_id
- line_items
- rate
- quantity
Status Rules
- Newly created invoices are in Draft status
- Approval may be required before sending
- Auto-send depends on organization settings
-
Currency Rules
- Organization has a base currency
- Invoice currency must be enabled beforehand
- Exchange rate is required for foreign currency invoices
Validation API
- GET /settings/currencies
-
Error Handling Rules
Error Code Meaning 401 Invalid or expired token 403 Permission denied 404 Resource not found 429 Rate limit exceeded 500 Server error -
Invoice Numbering Rules
- Invoice numbers are auto-generated
- Manual override allowed only if enabled
- Country-specific formats may apply
-
Recommended API Execution Order
- OAuth Authorization
- Generate Tokens
- Get Organization
- Get Settings (Tax, Currency)
- Create Customer
- Create Item
- Create Invoice